Windows 10 is possibly the most popular computer OS that is used by more than 1 billion users. That said, Windows 10 is still not the most reliable computer OS. In fact, a majority of programmers and creative professionals prefer using Ubuntu over Windows 10. So here’s a simple guide on how to install Ubuntu alongside Windows 10. ALSO READ: The Best Free Antivirus Software For Windows 10 PC In 2019
Ubuntu Vs Windows 10
Ubuntu Vs Windows 10Dual-Boot Windows 10 And Ubuntu: RequirementsHow To Dual Boot Ubuntu With Windows 10
Ubuntu is a free and open-source Linux distribution based on Debian and its a popular operating system for cloud computing. Privacy and security are one of the two major reasons why a user might prefer using Ubuntu over Windows 10. Unlike Windows 10, Ubuntu doesn’t get aggressive software updates. Consequently, Ubuntu is a reliable operating system that outperforms Windows 10 in multiple aspects.
Dual-Boot Windows 10 And Ubuntu: Requirements
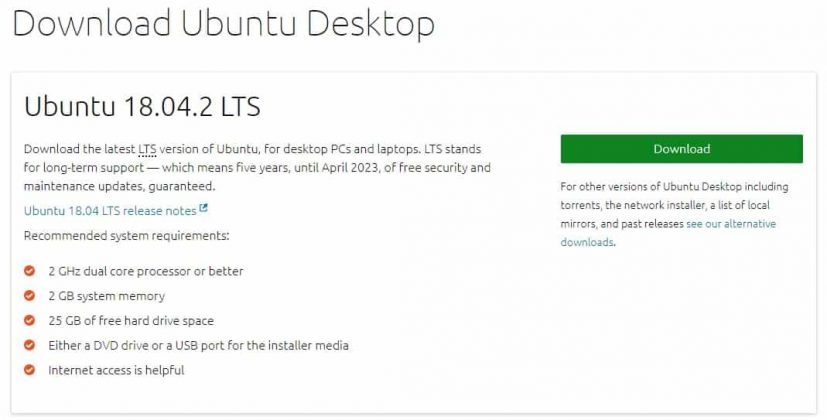
Before initiating the actual installation process of Ubuntu, it’s important to back up all of your important data. Additionally, you will need a USB stick with a minimum of 8GB storage to install Ubuntu alongside Windows 10. Lastly, ensure that your Windows PC fulfills the minimum hardware requirements for installing Ubuntu.
2 GHz dual-core processor 2 GB RAM 25 GB of hard-drive space VGA capable of 1024×768 screen resolution.
How To Dual Boot Ubuntu With Windows 10
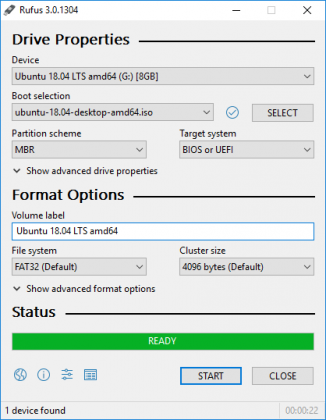
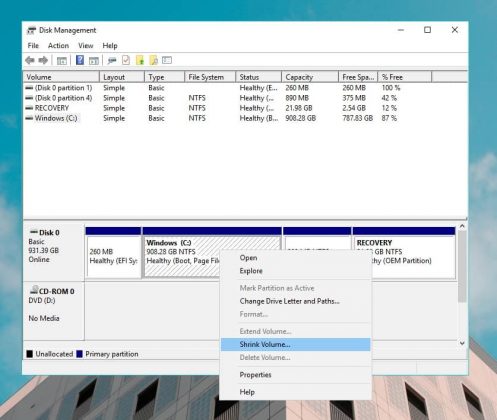
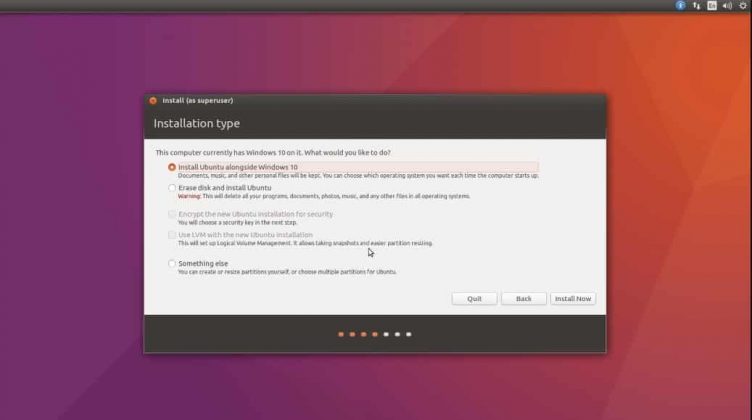
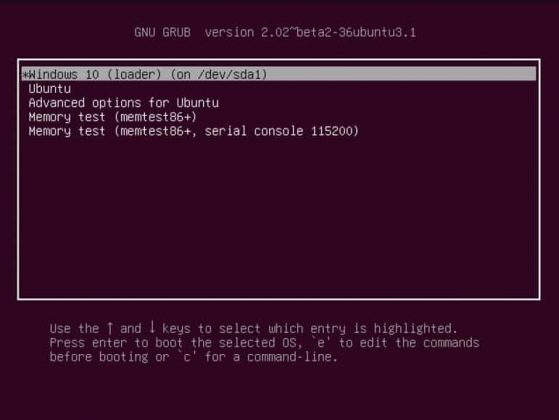
The first thing that you need before installing Ubuntu, is the Ubuntu ISO file which can be downloaded from Ubuntu’s website. Download the latest LTS version of Ubuntu which in our case is Ubuntu 18.04.2 LTS. In the next step, we have to create a bootable USB stick. The bootable USB stick for Ubuntu can be created by using a utility like Rufus which is UEFI compatible. You can download Rufus from its official website. Once it’s completely downloaded launch Rufus and under the “create a bootable disk using” section select the ISO image and locate the downloaded Ubuntu ISO file. The next step involves the creation of disk partition where Ubuntu will be installed. To do this open Disk Management and right-click on the drive which you want to partition and select shrink volume. We would suggest you to allocate a minimum of 64GB storage for the proper functioning of Ubuntu. Lastly, open the Boot Menu or UEFI Firmware settings and boot from the USB stick that contains Ubuntu. You will now see the Ubuntu installation menu on your computer. Select your preferred language and it’s important to select “Install Ubuntu alongside Windows 1o” if you want to dual-boot Ubuntu and Windows 10. The setup process is fairly straight-forward and once it’s completed restart your computer. While turning on the computer you will now get the option to either boot into Ubuntu or Windows 10. CONCLUSION So this was a simple guide to dual-boot Windows 10 and Ubuntu on one computer. If you face any issue while installing Ubuntu on your computer so let us know in the comments section below.


